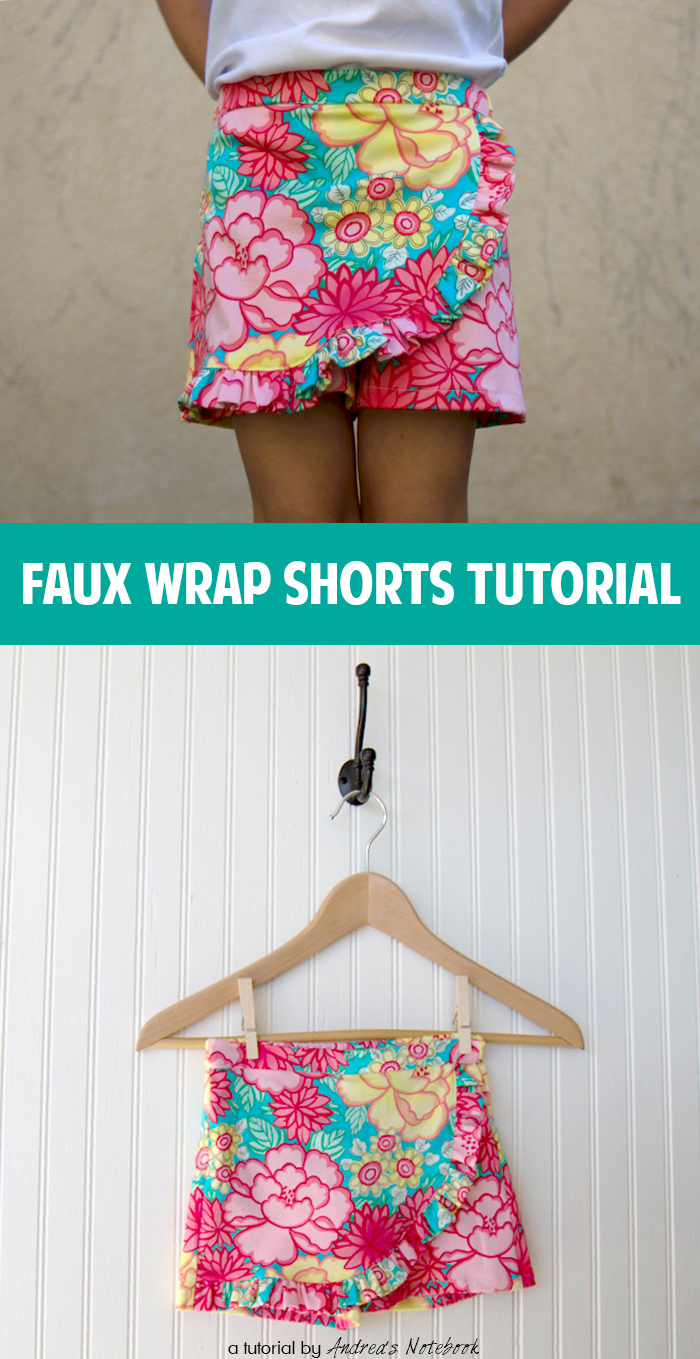
Today I am sharing a textbook: Faux Wrap pants for girls (or women) FIRST trace CURRENT SHORTS, TO MAKE YOUR SAMPLE. Tracing Tips: Turn your shorts inside out. Ironed them or stretch. Make sure your stitches on the edges and thread the other parts of the intra- so easy to follow. Make sure the bottom part and from the crotch upwards curve, and then do a straight up. Elastic shorts pulled on top, but you need to cut your fabric, like elastic in them yet. (See photo below) Add seam allowances and hem. For this model, I use 1 "(inch = 2.5 cm) hem allowance and a 5/8 "seam allowance. Take 3/4 "at the top, because you will do a separate belt. Note: I took an inch from the front pattern and added an inch on the back, because I made flat front waistband. Make artificial wrap template: Make a rectangle the width of the front short (Measurement of the front part of the template, subtract inside allowance and double). To subtract the length of 1.75 "at the bottom and 1.5" from the side, to make room for frills. Make a curved line as shown in the photo. Cut 2 front, 2 back, 1 Wrap a piece of artificial, 1 piece of frills 1 front waist portion and a rear waist 1 piece. Waistband is the length of the finished back and the front panel 3.25 ". Frills piece of 3.25 x 40 ". Right sides together, sew the front to and back to back on a curved crotch. Hem the back of the left leg and the right leg forward. Iron up to 1/4 ", and then 3/4" and top stitch. Make frills: Fold the fabric in half ruffle, wrong sides together. Use a basting (longest) Stitch along the edge of the unfinished and gently pull the bobbin thread to gather. Gather is not the length of your ruffle the lower edge of a piece of artificial wrap. Sew it then finish the hem with detonation or scissors Serger. Iron the hem up, then topstitch. Baste artificial wrapping part the front of the pant on top. Ruffle must match evenly at the bottom with a hem on the shorts. Sew the belt in the upper part of the front and rear parts, Right sides together. Then fold over and the iron belt twice. Iron seam towards the top and Fold the top of the belt under 1/4 "and iron. Do not sew closed yet. Stack Shorts front and back right sides together (Artificial wrap between them). Cut 3/4 "length of elastic waist child minus the width of the front panel. Attach elastic waistband with side seams with a zigzag stitch. Sew side seams and waistband pant. Put the belt on, the elastic trapping inside the housing bottom. Contact and top stitch making do not sew more elastic. Sew up the inner seam. Finish the hem on the unfinished legs. Then sew the seam right foot down. See photo below. You made! Read more
Sew yourself comfortable suit for recreation, is a linen cloth. materials 2.5 meters of linen and the standard sewing thread 5 buttons instruments Pattern Wizard, paper pattern paper, fabric scissors, rotary cutter fabric marker, pins, tape measure, seam ripper bias tape maker, buttonhole foot, hand sewing needle Steps Note: Pre-wash fabric. 1. The pins, so it's easier to work with. 2. The diagram shows the pattern US size 4-6 (England size 8-10). Do not forget to add a 3/8 inch (1 cm) allowance around all panels. If you need help, follow this tutorial. Add 3/8 inch (1 cm) on all joints of panels, unless otherwise specified. 3. Use a serger, or choose your own method to protect the seams from abrasion. Make sure that you You choose a method that does not add to the weight of the fabric. 4. Pin along the curved edge of the two pocket panels. Sew them together. Repeat the same for the second pocket. 5. To attach a pocket on the bodice comply with open pocket in the side seam bodice panel, as shown in the photo below. Sew along this seam. You will only sew bottom pocket panel on the bodice. 6. On the wrong side of the pocket and the back of the hand to her bodice, match cuts and attach the other side of the pocket the opening in the back of the bodice. 7. Further, the contact with the side seam of the bodice, all the way down to the bottom of the leg. 8. Sew the line, and be very careful, when you reach a hole pocket, and make sure you are not caught the other side of the pocket. Press the seam. 9. Further, the contact feet together in panel (Panels must be facing outwards) .Sheyte Along the seam allowance and press Open. 10. Conclusion shoulder seams and sew together. Repeat steps 5-9 for the other side. 11. Turn on the half on the front side, and place it in the other half. 12. Output from the middle of the back of the bodice and a crotch seam, right up to the front panel and dwell on the indication of partial buttons. 13. Stitch on the seam, and then click Open. 14. After this tutorial, create a 1.5 m mandatory bias tape. 15. Firstly, the switch to connect around the armhole Romper in the first. 16. Leave about 1.15 inches (3 cm) tail loose, a process to attach the tape along a curvilinear edge leave about 1.5 inches (4 cm) clearance since the beginning of the pinning. Finally, leave about 1.15 inches (3 cm) in the tail end of the pinning as well. 17. Stitch on the pinned edge. 18. Then manually match the remaining unattached edge and fold the tape in the opposite direction, They form a kind of fold lines. 19. On the side of the outside belt, pin on this fold line. Staple line and press. Trim excess fabric. 20. refolding tape on the right side and pin on the left hem, the top line again and press. 21. Repeat for the other armhole. 22. For the collar, again as a bonding seams armhole, simply attach the tape to the front of the center, and a pin along the collar, leaving no additional tailings. 23. Top-stitch on this tape. 24. Then, after this lesson, follow partially buttons on the front of the romper. Remember that it is women's clothing, so that material incision placement on the opposite side, as shown in the textbook greater than the cut strip will be placed on the front side of the material.) 25. Follow this tutorial to create loops 5 laying on top of buttons, arranged the same way. 26. Finally, sew on 5 buttons respectively on the opposite pocket in the skirt. 27. Last but not least, click hem pants on the wrong side panel and the top line of this skirt. Read more