
Drill bits for snegurochki knitted from yarn Ogonek kr №2, the edge of Heppi from Yarn Art
Posted by lilicy
Step 1 - Knitting the soles.
On the sole I take the yarn thicker than the main one, from which I will knit. And I knit it a little more tightly. This is due to the fact that the sole should be firmer, thicker, it is the main load. Also, the sole of the pinets is responsible for the beautiful shape of the shoe, it is the foundation, if you want)
So, depending on the desired size, it is worth experimenting on what size you need the number of loops. Yarn can be of different thickness and density, even with the same footage on the labels. Consider this.
I took the cotton of Gabby, he is 170 meters thick by 100 grams. Despite this, I manage to knit crochet number 2,5) For knitting the top I love yarn Lanoso Alara - it's cotton / acrylic, 140 m / 50 g or something like that.
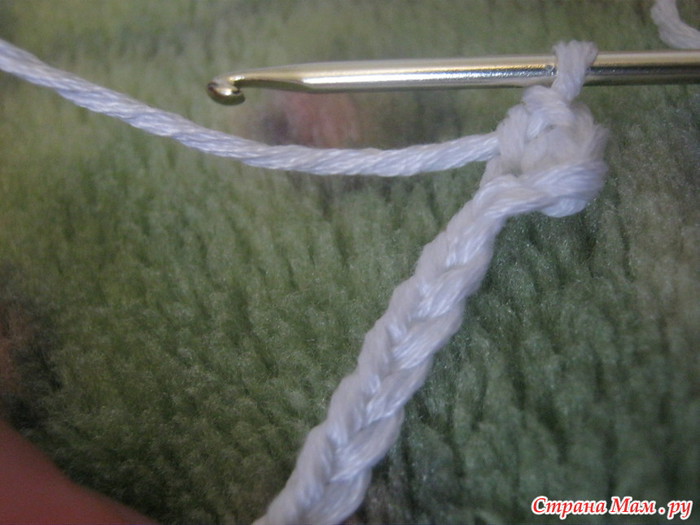
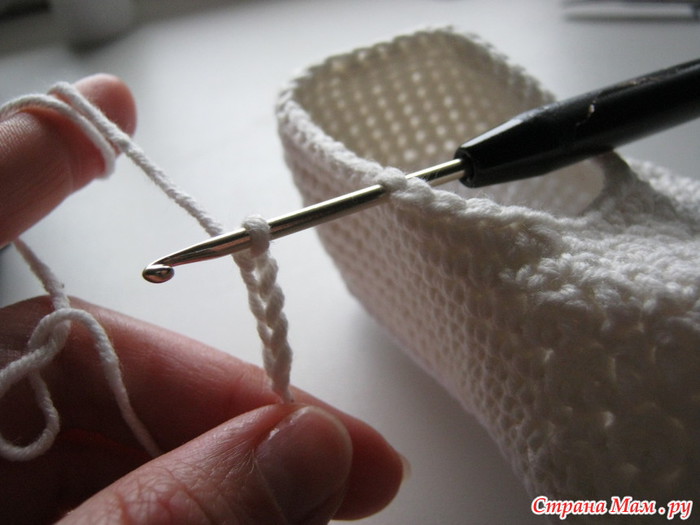
I tied a pigtail from 17 air. loops on the sole size of just over 12 cm - this is about the age of 10-13 months.
The circuit was developed by me independently on the basis of many tested variants. So to say in the process of knitting has made for itself the best option.
In the last air. I sew a loop with 2 stitches without a crochet.
On the sole I take the yarn thicker than the main one, from which I will knit. And I knit it a little more tightly. This is due to the fact that the sole should be firmer, thicker, it is the main load. Also, the sole of the pinets is responsible for the beautiful shape of the shoe, it is the foundation, if you want)
So, depending on the desired size, it is worth experimenting on what size you need the number of loops. Yarn can be of different thickness and density, even with the same footage on the labels. Consider this.
I took the cotton of Gabby, he is 170 meters thick by 100 grams. Despite this, I manage to knit crochet number 2,5) For knitting the top I love yarn Lanoso Alara - it's cotton / acrylic, 140 m / 50 g or something like that.
I tied a pigtail from 17 air. loops on the sole size of just over 12 cm - this is about the age of 10-13 months.
The circuit was developed by me independently on the basis of many tested variants. So to say in the process of knitting has made for itself the best option.
In the last air. I sew a loop with 2 stitches without a crochet.
Next, I knit 7 more columns without a crochet. Thus, taking exactly half the chain (8 loops). Next, I sew a half- tube as a transition to the extension of the sole on the toe and then finish the row with columns with a crochet. Schematically, the sole looks like this (only in the second row, I made a mistake by signing 5 columns with N. - there are certainly posts without a crochet)
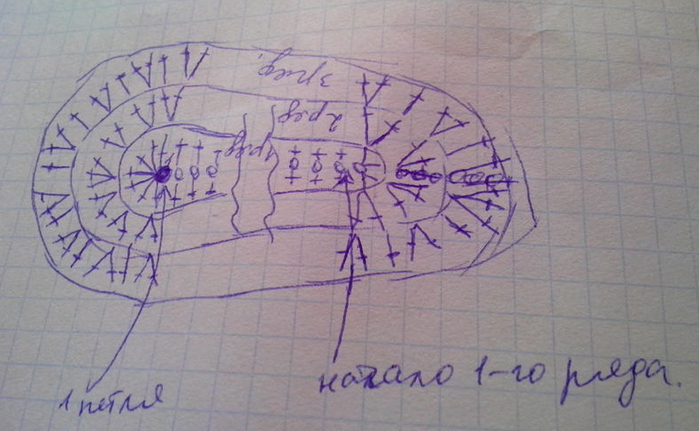
I hope it will be clear from my not very good sketches) In the end, I tie all the columns without a crochet, without making an increase.
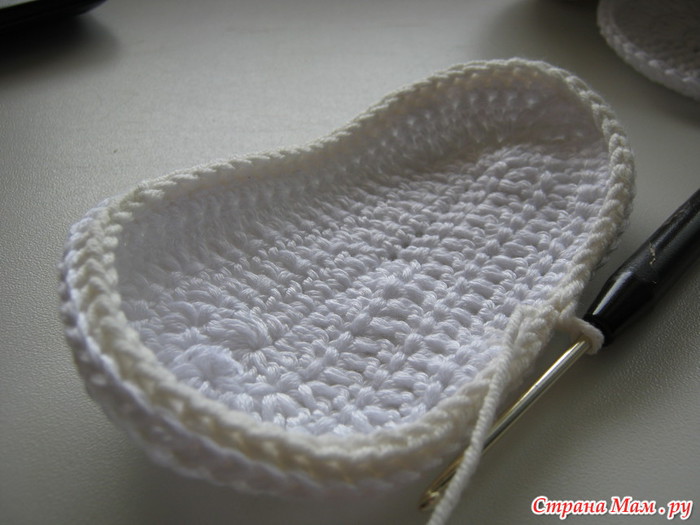
As a result, I got such a sole.
As a result, I got such a sole.
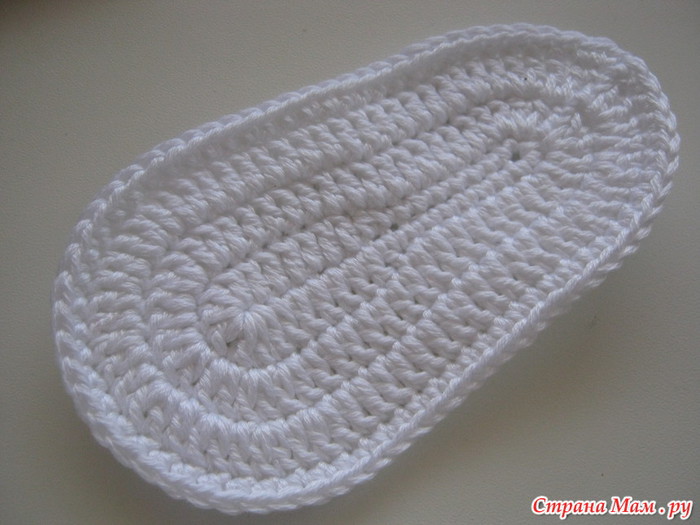
If you need to knit on the very tiny foot of a newborn, then you can not add the 4th row (columns without a crochet).
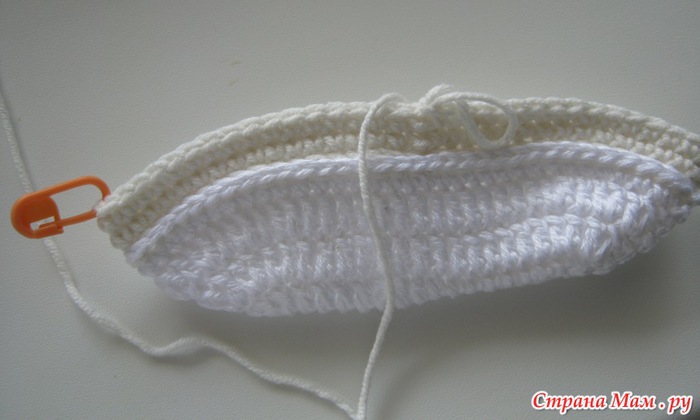
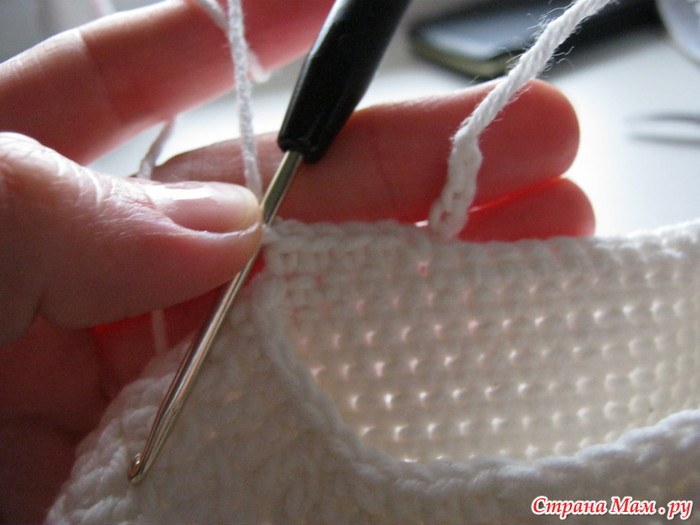
How do I tie the top? There is a little trick. Firstly, the row does not start from behind, but from the inner side of the sole. This is done in order to have less seams in sight, still the inside of the shoe is less accessible to the eyes, you will agree. Just for the sake of aesthetics.
Bend the sole in half and approximately in the middle we pass the thread for the strapping along the top. At the same time I thread the thread from underneath.
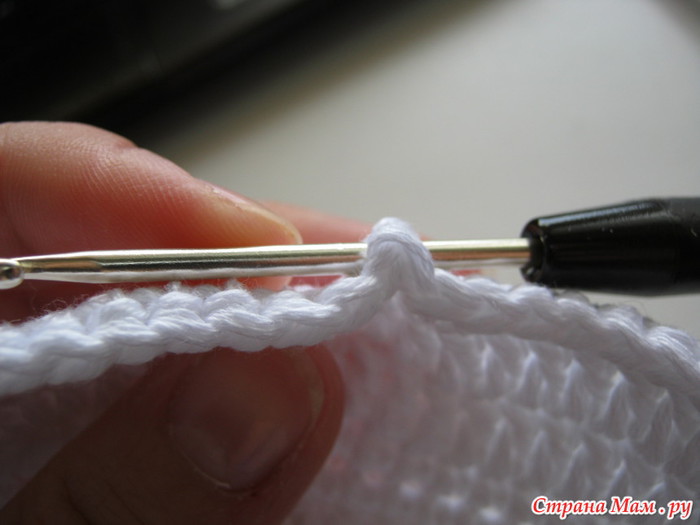
And so I knit the first row of tops with columns without a crochet, without making additions or deductions.
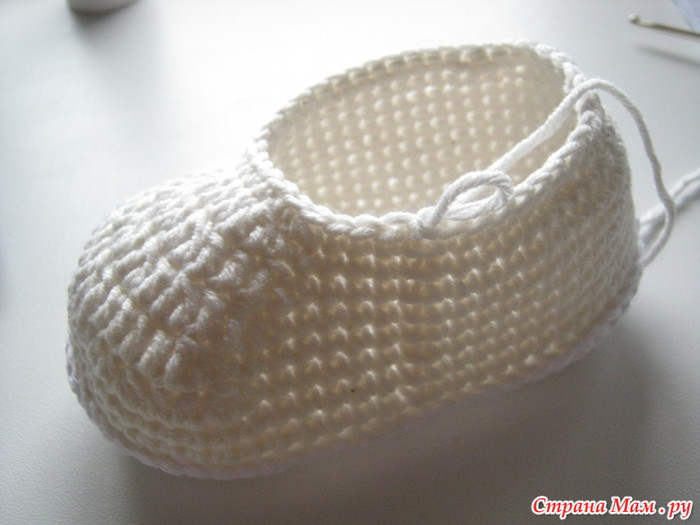
Next, I knit a couple more rows (for a small size, you can only tie another 1 row instead of 2), then add the soles already now along and find the middle of the toe.
And I'm pulling a toe on this circuit. ATTENTION here in the figure there is an inaccuracy in the signatures + - these are columns without a crochet! I apologize for a typo

It can be varied depending on the size - that is, the smaller the size, the smaller the margins of the deductions, if more, then you will have to add symmetrical discounts. For small size, the columns with the crochet are replaced by half-columns.
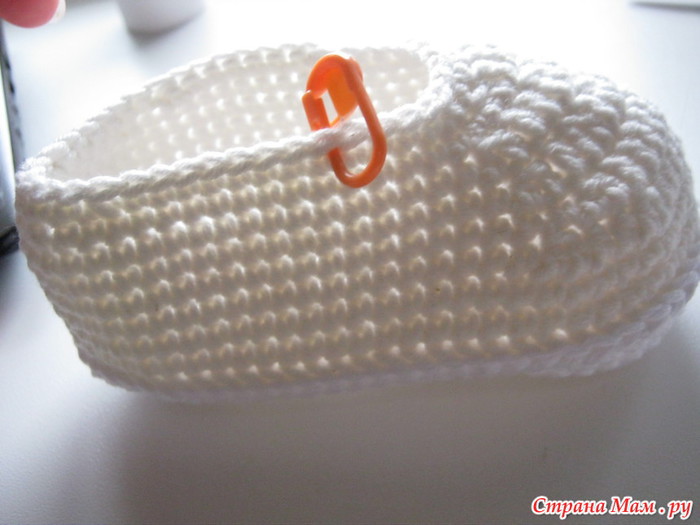
At the end in the upper two rows, you can also make 2-3 symmetrical decreases on the heel part of the booties, for a more physiological fit on the child's leg.
In the end , something must come out in this spirit:
At the end in the upper two rows, you can also make 2-3 symmetrical decreases on the heel part of the booties, for a more physiological fit on the child's leg.
In the end , something must come out in this spirit:
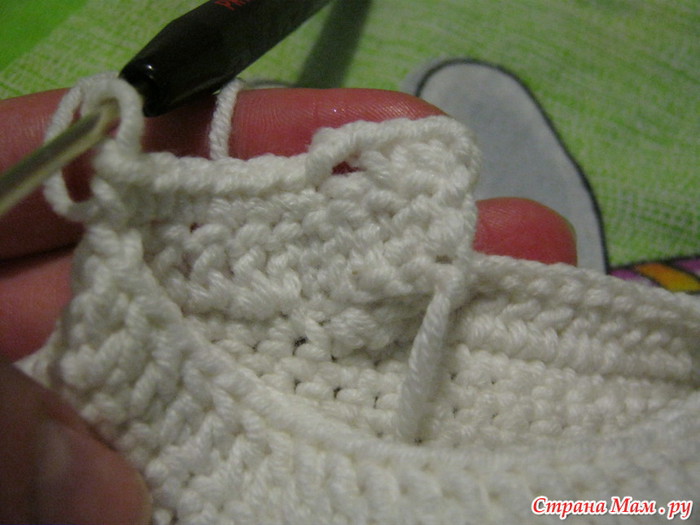
Then we put the booties along and from the middle of the top, lay approximately one third on the side opposite the seam.
We put the hook in there and if you were knitting on the same side as on my sample, then you need to make a hook on the hook. loops and knit from the underside of the toe with columns without a crochet.
When we reach the end of the row, unfold knitting and from the front side we begin to knit a row of columns with a crochet.
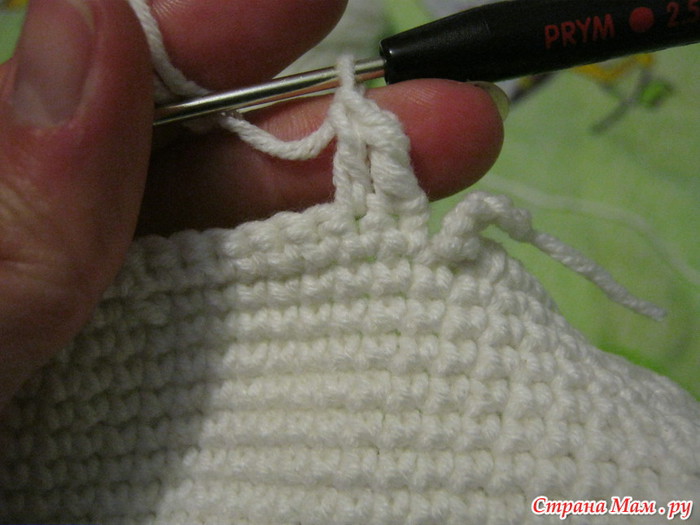
Again, unfold knitting and knit a row of columns without a crochet. At the beginning of the row, make a slot for the button, for this we sew 2 tbsp. without n. and 2 air. loops, passing from below 2 tbsp. of the previous series.
Next, we sew a row of columns with a crochet, then a row of columns without a crochet and again a row of columns without a crochet, in one of the rows one can make a pair of increments to extend the bootleg.
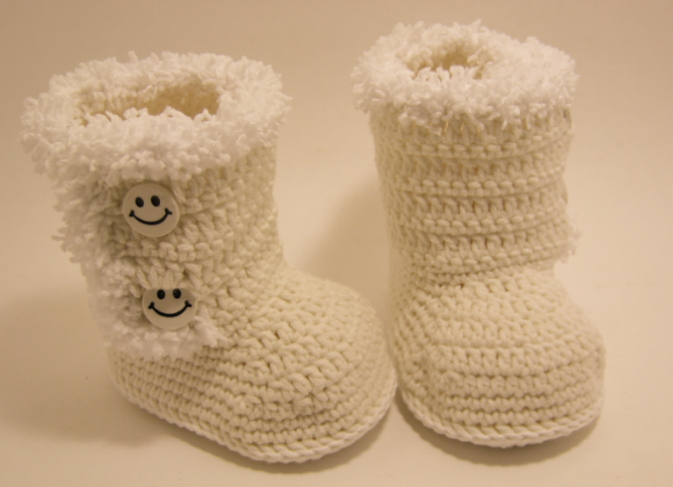
And then in the same way we make the second slot for the button, in the end we get the edge with the overlap and the slits for the buttons
And then in the same way we make the second slot for the button, in the end we get the edge with the overlap and the slits for the buttons
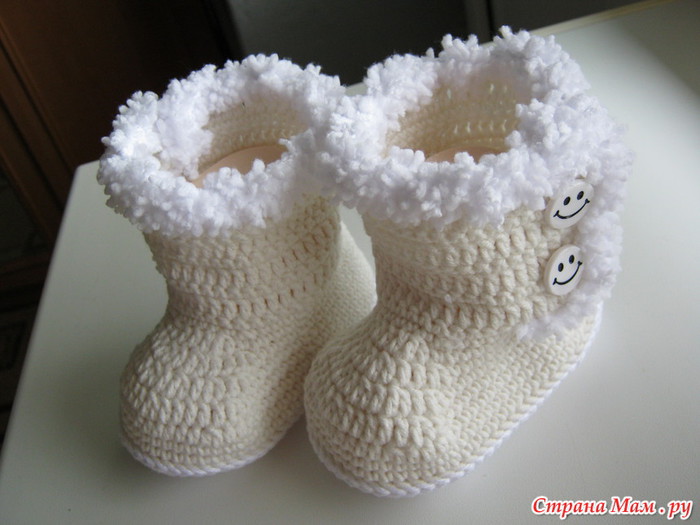
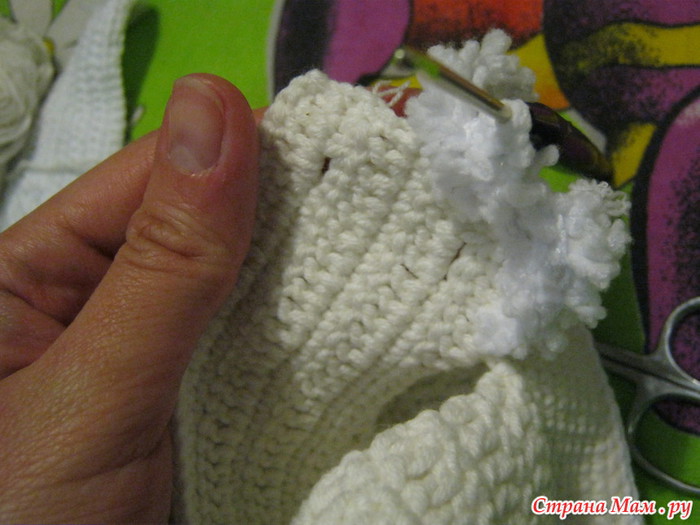
Bootetka is almost ready, it remains to make the bandage a fur coat and sew buttons. As a strapping, I take yarn like Krokh Nazar-Rus or Anakuzusa Kartopu, very similar to crumbs, but even much softer. And I knit it from the wrong side of the top edge and overlapping of the pinets. Why with purl? It is also established experimentally that when knitting this yarn, the face of the knitting looks less lush and the thread parts are visible in it, while the underside of the cloth, tied with Crumb or Anakuzus, looks like a solid fuzz!
The penultimate step when knitting pinets-ugg is sewing on buttons. It is better to take some beautiful baby buttons in tone.
I think it's logically understandable, but just in case, I'll add that we make the second booties in a mirror image) That is, if the overlap began with knitting on top of the braids from the air. loops, then on the second boot it will be necessary to knit these loops at the end of the first row of the top.
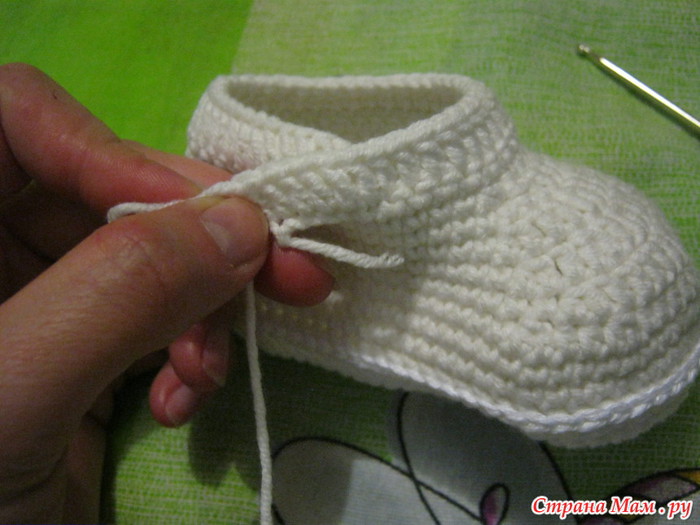
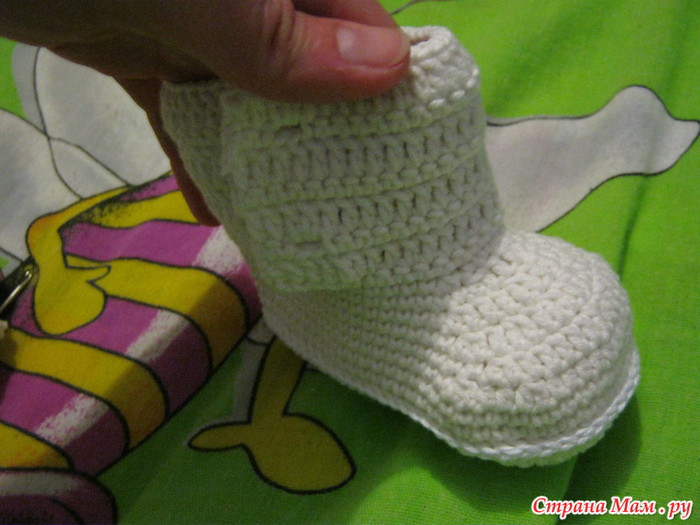
That's the result I got, I hope you will get much better)
I think it's logically understandable, but just in case, I'll add that we make the second booties in a mirror image) That is, if the overlap began with knitting on top of the braids from the air. loops, then on the second boot it will be necessary to knit these loops at the end of the first row of the top.
That's the result I got, I hope you will get much better)