

Pattern (all lines in alternating blue and white threads):
6 hours, and form a ring with 1 SL. Do not tighten! The void in the center should be large enough to stick to the hours that you want to install, then passes.
Round 1 .: 12 dc in the ring
Row 2: 2 pieces in each st to end = 24
Row 3: (1st, 2 DC next m) line = 36
row 4: (2 DC 2 DC next loop) to the end = 48
number 5: (3 dc, 2 dc in the following loop) to the end = 60
row 6 (4 DC, DC 2 in the next loop) = 72 to the end
number 7: (5 VDC, 2 DC loop to the next) line = 84
and so on.
I've got a card with a yarn of Make Creating and 24 different colors. I used double yarn and yarn for the background for all the others. Movement , I also bought there, as well as buttons and felt figures .
long needle was 11 cm (second hand 1 cm longer, but extend as far as the minute hand).
As soon as the work was, how long needle, and then some (I stopped at 12 cm), I started to change the color of the rainbow.
Then hook in the same way, but change the color of each line, while the clock is not as big as you want it.
There are many videos showing how best to change the color.
Some links here: Yarn Studio , MiA Mini spiration ,
NeedleNoodles , Virkskolan
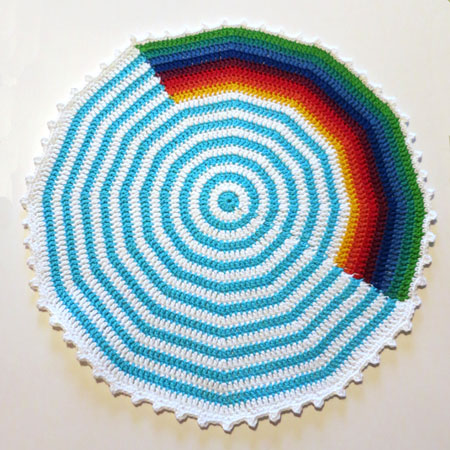
The latest series of the DC crochet 4, 1 pico CH 3, 4 dc, etc. in a row.
Then I drew all the threads and stroked the medallion was so smooth and good.
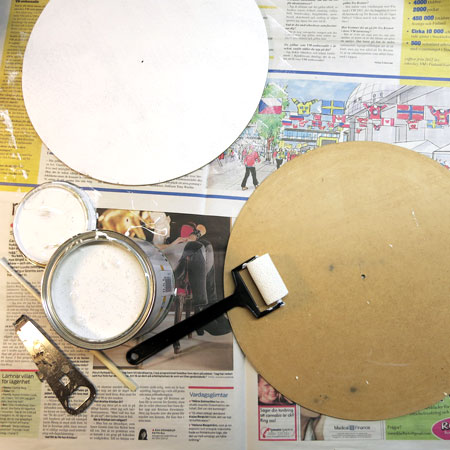
When I clearly knew how to knit and will be a great background. It is not easy to know in advance, it depends on the thickness of twine, and the firm crochet.
I have a handy guy, so I asked him to cut out the desired diameter in a piece of Masonite and drill a hole in the middle. Note The hole in the center should be large enough to stick on the winding through. There, I forgot, so I had it a little awkward to fix it later. Again, it is fortunate that I have a handy man who can drill a hole without damaging the front panel.
In order to get a good surface and do not let it shine brown crochet, I painted them white in the front and rear.
While they are dried, it's time to crochet flowers!
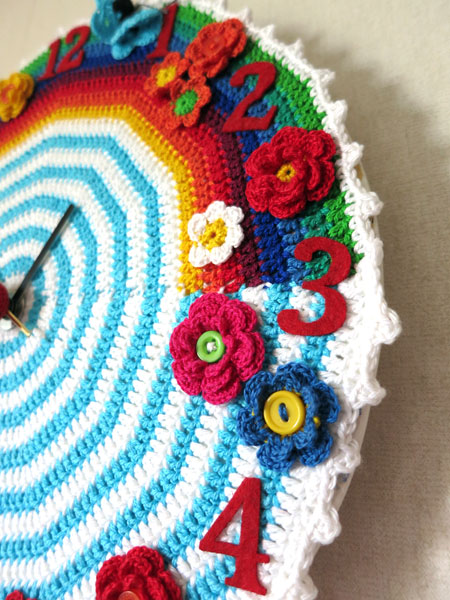
flowers
There are a variety of free templates for crochet flowers. Just select a few that you like best.
Some of them can be found here: Yarn Studio , the majority of the hook , the King and Majkis , piercing , create and decorate , Attic24 , Molly makes
If you want to watch movies, how to do it, there are many to choose from, as well as: Drops Design , Epicabundance and a number of others .
Just let your imagination run free, a mixture of varieties and colors as much as you want!
Butterflies
For the butterfly, I found a very nice template that Marie Pedersen of Silk & Burg did.
Marie has a lot of good pictures that show how to do it.
Template translated into Swedish as follows:
(1st position, as usual, CH 3)
Tier 1 - (3 the DC, CH 2) 8 times in the magic circle , 1 SL-st in first st.
The Row 2 - 1, ( DC 3, CH 2 3 DC) in the air in a loop from the CH 2 of the previous round. Repeat 8 times, but the last time you will end up with 2 instead of 3 and SL-st in first ST = 8 groups of 3 DC, CH 2, 3 DC.
Round 3 - (8 pcs in the paint in the previous round, 1 SL- a first gap between the poles of the group in the preceding line) 8 times. SL-1 st in first st. = 8 groups of 8 pieces.
Leave a long thread, cut the thread and pull it through the last stitch.
Fold in half and sew.
Make antennas on the hook 15 lm, and bind the remaining threads. Pin and cut it.
I made my antenna stitching simple garnbit instead.
You can make a multi-colored butterflies, changing color after the second round.
I patted a little glue on the stick "antennas" to make them a little tougher and not cut them until they are dry.You can also make as Marie twisting together the wire antenna!
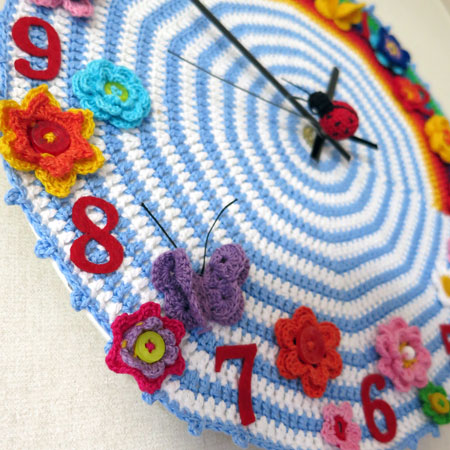
LADYBIRD
Ladybug I found the free samples can be found here .
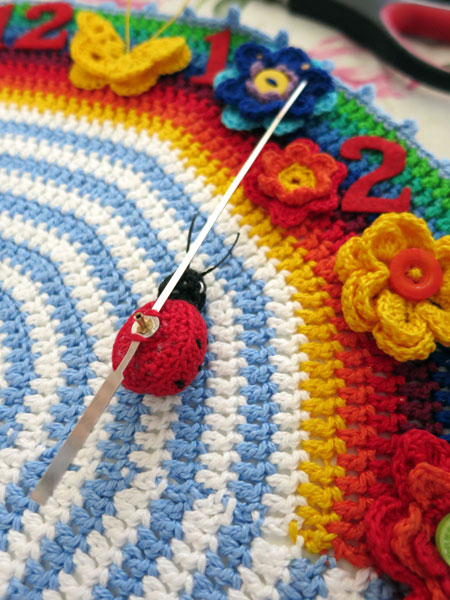
Ladybird I sewed on the second hand with
a few stitches of the front and rear.

The figures I have pasted a solid, and then it was only to place flowers,
where I am (well, Annie was a fairly accurate representation also) wanted them.
It is important to think about the withdrawal from the hands-free to, so that they are not subsequently stuck stuck in some colors.
I sewed buttons and flowers, not to do, Matt, glue them there.
In certain colors, I chose to mount instead of beads.
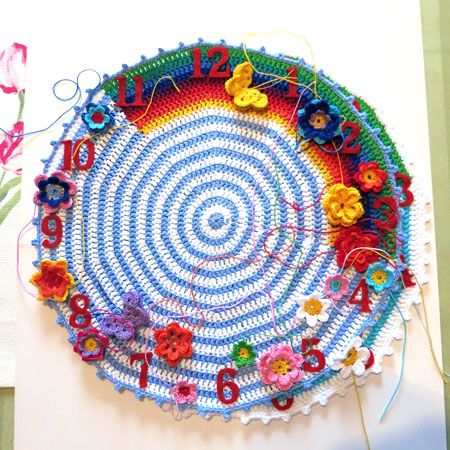
Then I wiped the glue stick on the background, cast in knitted watch and be sure to get the center, where it was drilled and tightly pressed against the surface of crocheting. I had to pull it out a little, so that it came to the edge.

It was a bit difficult to get the oil. Masonite was a bit thick, so I had to cut out a bit to make my stick to screwing. Some of the violence, I also used to set bulbs, these were pressed on my stick.


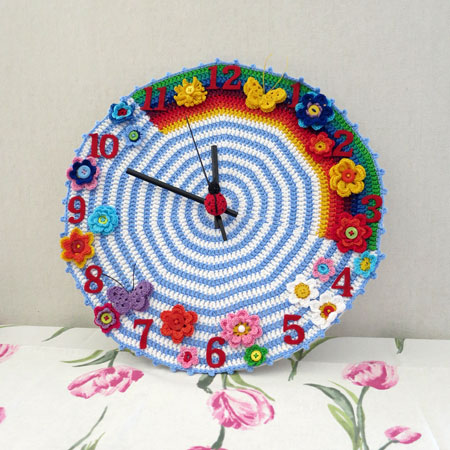
Done!


beautiful, but for me is easier with a patron.
ReplyDeleteYes,I prefer the pattern too . but It isn't my work .It is from the internet
DeleteThank you
Hi Silia
ReplyDeleteWonderful work.Notable to take out the eyes from this
Again a big thanks for sharing this with us
I will do one for sure
great greatest