

To sew dresses of this style will suit any dress fabrics, fabric consumption will be from 2 meters or more, depending on the length of the article.
How to remove these measurements, you can clearly see in these pictures
So, for building patterns, we need toremove the following measurements:
LL - line blades 16,5sm =
LH - breast line = 22,5sm
TPA - length = 39cm waist back
loops - the width of the back (half scoops) 35/2 = 17,5sm
NPC - the slope of the back shoulder = 39cm
SH - breast height = 24,5sm
PDS - armhole width = 9cm
accident - length = 42cm waist forehand
NPP - the slope of the shoulder forehand = 23cm
DB - length side - 1.5 cm = 20-1,5 = 18,5sm
SHG1 - the width of the chest first (half scoops) 38/2 = 19cm
SHG2 - chest width of the second (half) 34/2 = 17cm
ASU - level solution tucks = 7.5 cm
RC - center of the chest (half) 19/2 = 9,5 cm
NL - neck girth (half) 30/2 = 15cm
SG - chest (half) 82/2 = 41cm
DPL - shoulder length = 13cm 

the core of our patterns is measurement SG (putting breast ), which makes an increase 3-10sm for free customized fit, the more gain is given, the freer is our style of dress. In my version of a fluffy dress, so I made an increase of 8 cm, ie, 41 + 8 = 49cm. This increase will also need to distribute measurements: AL - 1-1,5sm, SHG1 - 0,5-1,5sm and to PDS - the remaining value, ie, 8cm increase to minus and minus AL increase to SHG1. I added to the AL and SHG1 by 1.5 cm, and the PDS to the left to add 8-1,5-1,5 = 5cm (PDS = 9 + 5 = 14cm)
We now turn to the design pattern. For this purpose, a sheet of paper in the upper left corner construct a right angle with the vertex at the point R. from point P down consistently postpone LL + 0,5 cm (16.5 + 0.5 = 17cm - RL segment); N + 0,5 cm (22.5 + 0.5 = 23cm - stretch RG) and DTS + 1 cm (39 + 1 = 40 cm - RT segment). Swipe left straight points from G and T. From the point of the left T postpone recess waist 1,5-2,5sm, in my case, the interval TT1 = 2.5 cm. Connect points A and T1, while crossing a straight line formed by the chest point G1.

Now postpone width back from point A to the left (AL + 1.5 = 17.5 + 1.5 = 19cm - segment LL1). From the point of L1 drop the perpendicular to the straight line of the chest and get the point T2. From this point of the armhole width postpone our product, ie bushel with the addition of PDS, which we did at the beginning, the segment G2G3 = 14cm.Divide this piece in half and let the middle point O from which we drop a perpendicular to the waist line, we get the point T2. From T2 up postpone DB - 3.5 cm (18,5-3,5 = 15cm - T2O3 segment), this will be the depth of our armhole.

From the point P to the left postpone the width of the germ - interval equal to 1 / + 3SSH 1,5-2sm, those. PP1 = 1/3 * 15 + 1.5 = 6.5 cm. From P1 to detect an arc of radius equal to the DPL + 0,5 cm = 13 + 0.5 = 13,5sm, but from the point T1 arc radius OPS + 1cm = 39 + 1 = 40 cm. The point of intersection of these arcs denote the point P, and join the points P1 and P. We have built a shoulder cut.

From the point T3 postpone breast width, ie, SHG1 + 1.5 cm = 20,5sm - segment G3G4. From the point G4 draw a line on which defer up chest height, ie, HS + 0,5 cm = 24.5 + 0.5 = 25cm - G4R2 segment, and from the point P2 in a straight line down postpone accident + 1cm = 42 + 1 = 43cm - R2T3 segment - length to the waist. Now combine a smooth straight points T2 and T3.

Further, from the point P2 to the right of the germ postpone width shelves - a segment equal to PP1, ie R2R3 = PP1 = 6.5 cm. From P3 point 5cm postpone the right and get the point P4 from which the downward slope of 1 cm postpone shoulder - this is the point P5, which must be connected to the P3 point.

On line from the chest to the right point G4 postpone RC + 9.5 = 0.5-1cm + 0.5 = 10cm and obtain point C, which is connected to the point P5. From point C on the line TSR5 postpone ASU + 0.5 cm = 7.5 + 0.5 = 8cm - segment Comm. From the point of have to detect an arc of radius equal to the difference between the yardstick SHG1 and SHG2, ie 19-17 = 2cm. And from the point C draw an arc radius ASU + 0.5 = 8cm. At the intersection of these two arcs we get the point U1. Now, from point C through U1 spend a segment equal TSR5, we get the point P6. Thus, we have constructed a breastplate tuck.

From the point P6 to detect an arc with a radius of DPL-R4R6-5sm + 0,5 cm = 5.4.13 + 0.5 = 4.5 cm, and from point C to detect the arc radius GMP + 0, 5cm = 23 + 0.5 = 23,5sm. The intersection of these arcs form a point P1, which we connect with the point P6 and get a cut of the shoulder.

Now we construct checkpoints armhole.
From P1 to the left draw a line of G3 hold up the perpendicular at the intersection point of these lines is formed on the segment A. G3A postpone the 1 / 3 of this segment and obtain a point O4. We draw the armhole shelves, combining smooth straight points P1, O4 and O3.

From point T2 postpone G3O4 + 1-2cm, we get the point O5, from which left postpone 1cm, we get the point O6.Smooth direct connect point P, O6 and O3, and back armhole ready.

Pattern is built shelves and back. But our style is no shoulder seams, so we need to measure the distance to a new neck dresses. Merck this is removed from the seventh cervical vertebra down to the desired length. I have this distance was 10cm. Therefore, from the point P down postpone this long and get a point K. From point K to the left to draw a line and get back armhole point K1. We raise this point up to 1-2cm armhole (point K2), a smooth line connect point K and K2. Down from the point P2 also postpone our desired value, we get the point K3, from which the right to draw a line armholes shelves, we get the point K4. We raise this point at 1-2cm and join a smooth line with K4 point. Erase breastplate tuck and get just such a pattern bodice dresses Maid Seredinny with one seam on the back.


Cut our the pattern and put on cloth, folded in half inside out. In this case the pattern are putting to the fold of tissue, departing from the upper edge of the tissue 7-8 cm. Cut out the pattern with margins of 1 cm, and the neck allowances 6cm do that we need for frills and kuliske, which we then prodenem gum.


The sleeves we cut directly on the fabric. For this, two identical rectangular cut out a desired length and width.

The length in this case depends on such a sleeve you want: short, three-quarters or long. I chose three quarters - is 45cm + 2cm to 6cm processing hem and the neck = 53cm. The width of the sleeve should be more hands on girth measurements 3-4cm for free customized fit and + 2cm on allowances, and for more puffed sleeves add up to 20-30cm. I added a little more than 30 cm, and the sleeve has turned fairly lengthy.
We add our rectangles in half, face inwards. We put the pattern (see photo) to the lateral shear sleeves, departing from the edge of 1 cm from the side and from the top 7-8 cm. Contours armhole shelves from point O3 until the end of the armhole shelves. The point O3 on the fabric make the notch

and turn up our sleeve on the other side wrong. Focusing on the notch, impose a pattern to the side of a sleeve slice, departing from 1cm slice. Contours of the back armhole from point O3 until the end of the back armhole.

Now deploy our sleeves and join the wrong side of a smooth line endpoints armhole back and shelves. We draw a smooth line sleeve lower section Cut up our sleeve with allowances: at the top - 6 cm, at the bottom - 2cm. The second sleeve is cut the same way.

The style skirt in dresses farmer may be different options, take the most simple: when the basis skirts rectangle (1), to a skirt, you can add a frill (2) or a skirt-sun (3).

The length of layers is also It can be different: and above the knees, and midi and maxi. I opted for the skirt of the rectangle. Its width should be greater than or equal to the length of the waist products (it is twice the length of otrezkaT1T3), in my case the width is greater than the length of the waist of the product. Well, and the height of the rectangle -. Is the length of the skirt + seam allowances

Getting tailoring the product.
If you have a serger, all sections better handle overlock. Unfortunately, I have a machine there, but since in this case the fabric is not loose, I did overlock stitch for decoration, but this line does not handle the edge of the fabric.
And so we put our face sleeve inside, sew them on the side seams, and we iron out the seams.


Handling the bottom of our bags.

and we lay line for kuliske, leaving a small portion for threading elastic bands on the bottom of the sleeves.

Now stitch our sleeves to armhole products and iron the seams.

that's what we've got.

we turn to skirt dresses. Since the width of the skirt longer than the length of our waist, we need to build on the machine two parallel lines along the waist skirt, stepping back from the edge of 1cm and securing lines themselves.Stitches should be as large. Now contract the threads and distribute the fabric evenly to the width of our skirts matched with the length of the waist of our products.

Sew our skirt with bodice at the waist and seam press out up products.

We add our product inside out, align the waist line and grind along the middle seam on the back and skirt seam iron out.

Getting to the treatment of the neck. First Tuck edge 5mm, then 4 cm.

Sew the neck on the machine, leaving a small portion for threading elastic bands. Now, pave the line parallel to kuliske pritachke, departing from her 1,5-2sm. And ironing the seams.

If you, like me, have received wide sleeves, we will need to build on the machine two parallel lines on the top of the sleeve from the armhole shelves to the back armhole. One line should be routed below pritachki and the other just above the line for kuliske, trying not to hurt the joints to further their not break.

The lines are not fixed and contractible yarn evenly distributing sleeve fabric and then fasten these lines. That's what should happen.

It needs to be done to ensure that the sleeve is too wide in the future are not crawled by an elastic band. The second sleeve treated in the same way.
Now cutting Drawstring waist, its length - the length of the waist of our products at + 2cm allowances, 2,5-3sm width + 2cm on allowances. Tuck the edges of our kuliske and Sew it to the product with the wrong side of the waist, covering the seam at the waist.

On the front side we pritachivat lower edge Drawstring at this line should fall exactly in the seam sewing the bodice and skirt, thereby line will be invisible. On the wrong side of the top edge pritachivaem kuliske, leaving a small portion for threading elastic bands. Ironing the seams.

Now cut into the elastic waist, neck and arms. Threaded gum kuliske sleeves, neck and waist and sutured left for their plots.

Now process the bottom product. It remains for us to cut out and sew the belt, if desired. We perform the wet-heat treatment and all! Our dress is ready!

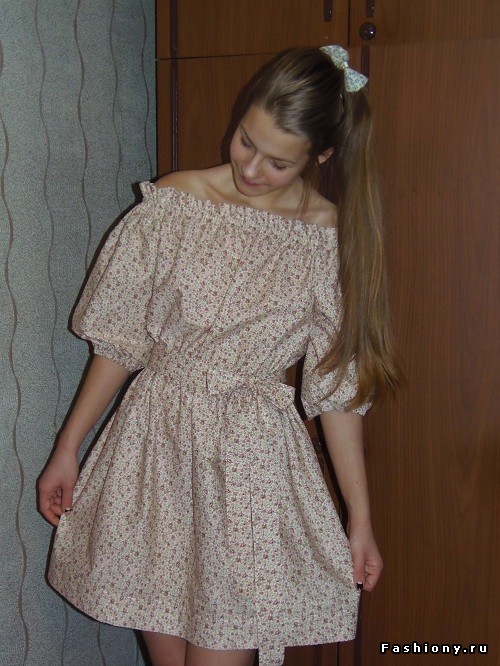
Now we try on the model and look closely from all angles.


No comments:
Post a Comment